Product design prototyping is an important step in the development of any product. There are lots of stories and studies sharing the value of this, but suffice it to say, without prototyping, product development would be much more time consuming, expensive, and risky.
Prototyping, in its most formal definition, is the production of a functional product, built in materials as close as possible to the production materials, built to the tolerances of the production drawings and assembled to test. These prototypes we call “Engineering Check Prototypes” because they “check” our engineering and are used for full functional testing. Sometimes these can also be used in Compliance Testing and Certification submission for UL, FCC, TUV, CE, CSA and others. There is a caveat here about certain submissions requiring full production molded parts, not machined samples in the same materials, although it seems to be a case by case issue depending on the product and/or market.
Prototyping, more broadly interpreted, can and is used for validation in many steps of the development process. It can be used as form studies to check ergonomics, subsystem test builds to assure function early in the process or engineering check prototypes to check engineering files and test prior to production ramp up.
Prototyping described above is really just prototyping of products, but product design prototyping could also apply to computer software applications or web site apps. These digital products are often prototyped to test user interactions and market acceptance. Google developed a process called “Design Sprints” which is an accelerated process to study and identify problems, conceptualize and develop solutions, create prototypes and test them in about 5 days. Obviously, because it started with apps, the prototyping can be done very quickly (in hours not weeks) and testing can be done on a phone, tablet or desktop from those visual page examples.
The development process starts with proving the idea works, leads to physical studies of the device, mechanical and any other engineering occurs for production of the device and testing, tooling and ramp up begins. We’ll share how product design prototyping applies at each step of the development process as it flows from initial concept to mass production.
1.Physical Mockups

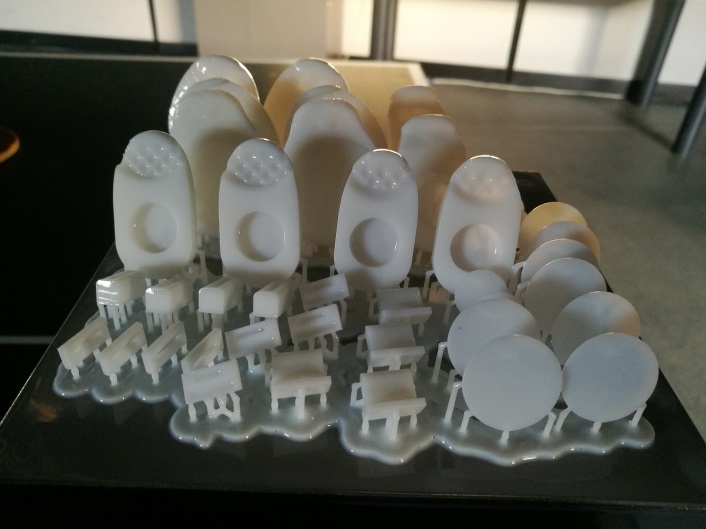
Prototyping can be necessary for any device early in the process to get the feel of it in space and identify and address ergonomic challenges. Handheld or wearable items are critically sensitive to the physical embodiment and these early mockups offer quick assessments, and highlight issues which can be solved and proven through testing these physically accurate models. Once we did an all-in-one glucose testing system based on our clients physical components and size, and after making 5 physical models of different aesthetics and styles, testing them worldwide, we found they needed to be 10% smaller to be of an acceptable size for the markets’ expectations. Models were remade in the smaller sizes and “voila” the market embraced them as acceptable. This was not too expensive and allowed for fast failure and retesting quickly.
Another example of the value of these mockups occurred when designing surgical tools and wands. Once, when asking a doctor in a focus group, “what would you change” his answer was “nothing, it’s fine”. Later, when we placed physical mockups on the table, he picked them up and had lots to share about good and bad things in the mockups we showed. We learned that a directional keying function was good but it looked like a button that would be pushed, so we minimized it to a flat surface and it met both goals, indicating the tool’s tip direction yet not overwhelming or misleading the users with its visual presence. The resulting product became the best arthroscopic surgical wand of its time.
2. Subsystem functional mockups or Test Mules:
Product design prototyping, in some cases is necessary to prove subsystem functionality early and reduce the chance that late in the process, we find something just flat out does not work. These early subsystem builds feed into that old principal “fail fast, fail early” which argues that if you can detect failure quickly you can make the product more robust by reducing the chance that you spent the whole development schedule only to find a flaw in one of the initial subsystem presumptions.
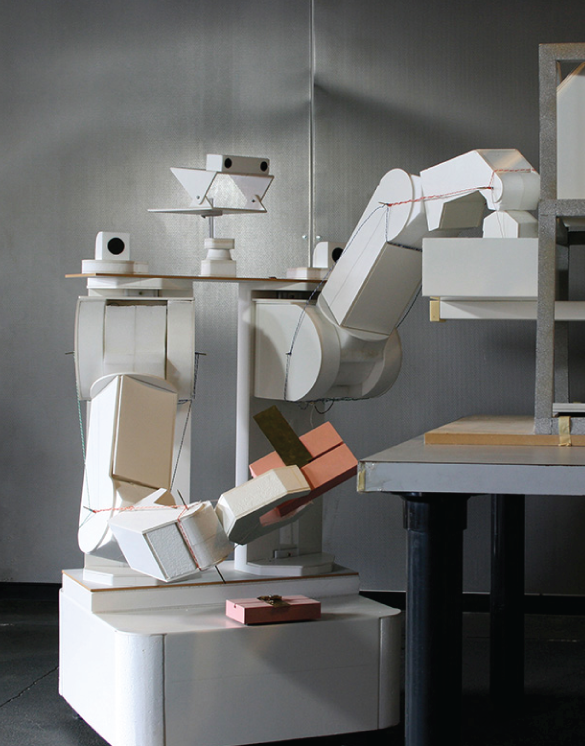
Product design prototyping, can also be necessary to test different ways to make something work. We call these “test mules” because they are used to do many tests, often of different physical sizes, angles, positions, distances etc. We did medical surgical carts like this dozens of times. We made stands which held displays or controls in a multitude of heights, angles, and distances from the patient. These allow full size testing of those interaction points, as they needed to be optimized for the doctors or nurses use in surgical and often critical situations.
Mechanical function test mules can also be used to prove a concept works mechanically while maybe not being visually accurate to the final appearance. This can be fast and inexpensive if you focus just on the items necessary to make it work. Or maybe it has multiple variables so we can try it in a multitude of variations based on the same parts. Once we had a door which needed to swing up to access the interior components for placing the scientific sample, yet it could not swing into your face while raising. We also needed it to be weightless, using counterbalanced gas springs and pivot/mount angles which changed the center of gravity and swing with each optional hole pattern we tested. We ultimately found the best locations for each and it finally worked perfectly. This was somewhat crude, made of plywood and metal lever arms but was made in hours not days and testing occurred immediately. As we progressed through the final engineering details, this was one area that did not cause us concern since it was proven early.
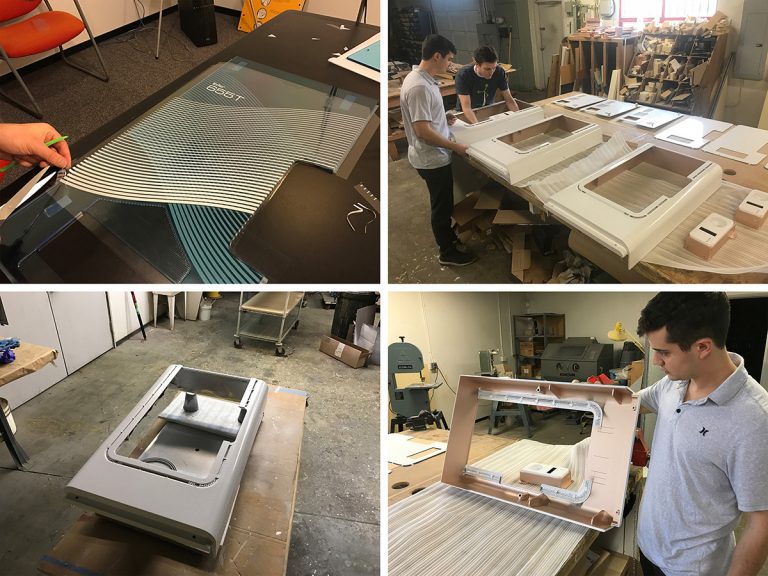
3. Engineering Check Prototypes
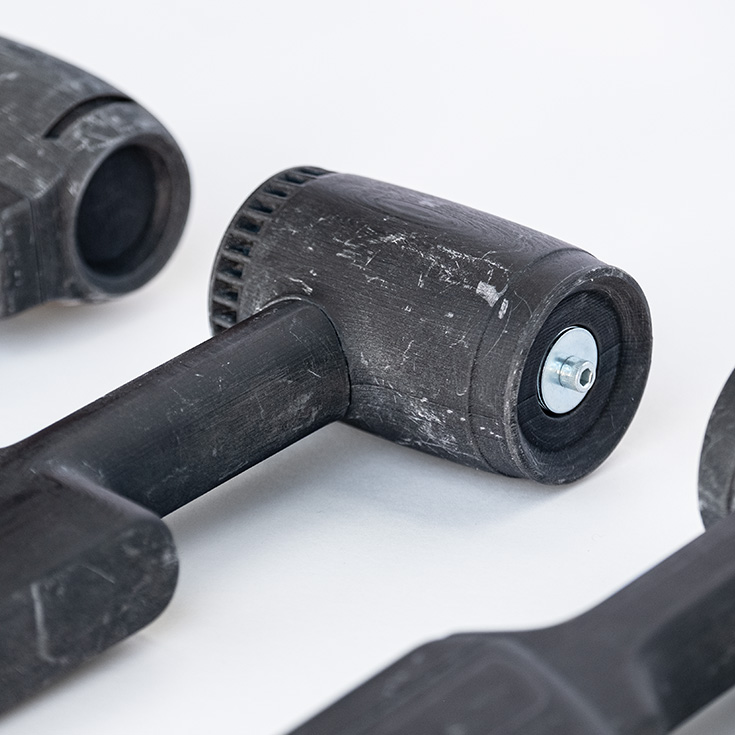
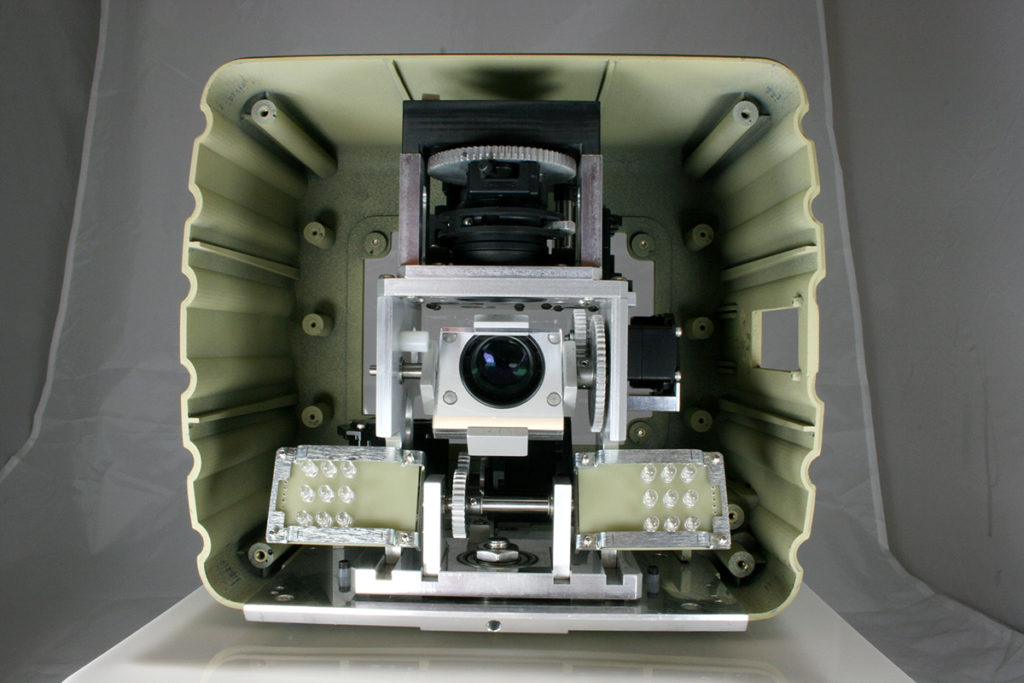
Engineering Check Prototypes are produced from machine grade materials which are as close to production materials as possible. The 3D CAD engineering files along with QC drawings which call out materials, draft, tolerances and accuracy of flatness or perpendicularity are used to generate the tooling paths for CNC of the actual geometry while the drawings indicate areas of greater sensitivity to unique criteria necessary to make the part or assembly work. This will ultimately validate that if we make the part to our files and drawings it will work. If we find something does not work in the prototype build, we check the dimensions and if we find an error we fix it in the drawings and CAD files and in some cases re-prototype, and in others the updates just go into the tooling release.
Materials closest to the intended production material will give us confidence in things like strength, flexure, snap feel, weight etc. These are all early chances to find mistakes or issues that will be painful to change later. If we suggest ABS/Polycarbonate blend, we make it machine grade PC/ABS blend of the thickest stock we can buy. If we need it to be thicker, we can bond two thick sheets together using a solvent chemical which will soften the material and create a molecular bond which is almost as good as if it was originally produced that thick.
This applies to all materials in the product design, sheet metal, plastic, adhesives, vinyl’s, bearings, effectively everything including electrical cords. One of the hardest things to prototype is custom springs. We have found that we cannot accurately define spring forces with typical Finite Element Analysis (FEA) CAD tools. So we define what we think is the correct spring to deliver the forces we want. Then when we prototype them, we prototype the one our analysis says is correct and we build two lighter and two heavier force examples, and through testing find the one that exactly correlates to our force goals. It is a bit more expensive to build 5 instead of 1 but way cheaper to do them all at once, instead of serially, one at a time.
In the end, product design prototyping is also a way to see market reactions. If you make a dozen or so, the marketing team can use them to test market the product with real customers. These are done before production begins so any lessons learned can be implemented into the product before production runs start. This saves late stage updates that affect tooling or other production ramp up things like fixtures or test methods. Any update that can occur prior to production release can save lots of time and money. After things are in production, a change can trigger tooling changes (very expensive), assembly changes (new training), sometimes even cause it to require re-testing and or re-submission into certification agencies (such as an electrical component or a material change).
Product design prototyping is the best method to check assumptions, prove customer acceptance, assure function or assembly or manufacturing methods, achieve early certification if allowable, test markets and users. It is the most cost effective, lowest impact, time saving tool available in product development. Please do it fast and often!
If you’re in Menlo Park and need some help prototyping, please stop by or contact us.